Better than the cheese Danish from your favorite coffee shop or gas station store—because they're fresh, flaky, and warm from your own toaster oven.
A Quick Bite of History
Despite its name, the Danish pastry didn't originate in Denmark. It actually traces back to Austria, where it was known as wienerbrød—or Viennese bread. In the 1850s, Austrian bakers were brought to Denmark during a local bakers' strike, and with them came laminated dough techniques that changed the landscape of Danish baking. Local bakers made it their own, and over time, the pastry evolved. In the U.S., it took yet another turn with the addition of sweetened cream cheese, making the version we now find in coffee shops and roadside gas station cafés.
So the next time you bite into one, know you're enjoying a pastry with real passport stamps—an edible blend of old-world technique and modern American comfort food.
In the U.S., it took yet another turn with the addition of sweetened cream cheese, making the version we now find in coffee shops and roadside gas station cafés [Britannica].
From Convenience to Craving
You've probably picked one up on autopilot—one of those glossy cheese Danishes from a gas station or coffee shop pastry case. Still warm, soft in the center, and sweet enough, they can easily count as breakfast or dessert. It's comfort food with a flaky crust, and for some reason, it always hits the spot.
But here's the secret: you can make one that tastes even better—right at home—with just a few ingredients and your toaster oven. That warm, creamy, just-baked magic you remember?
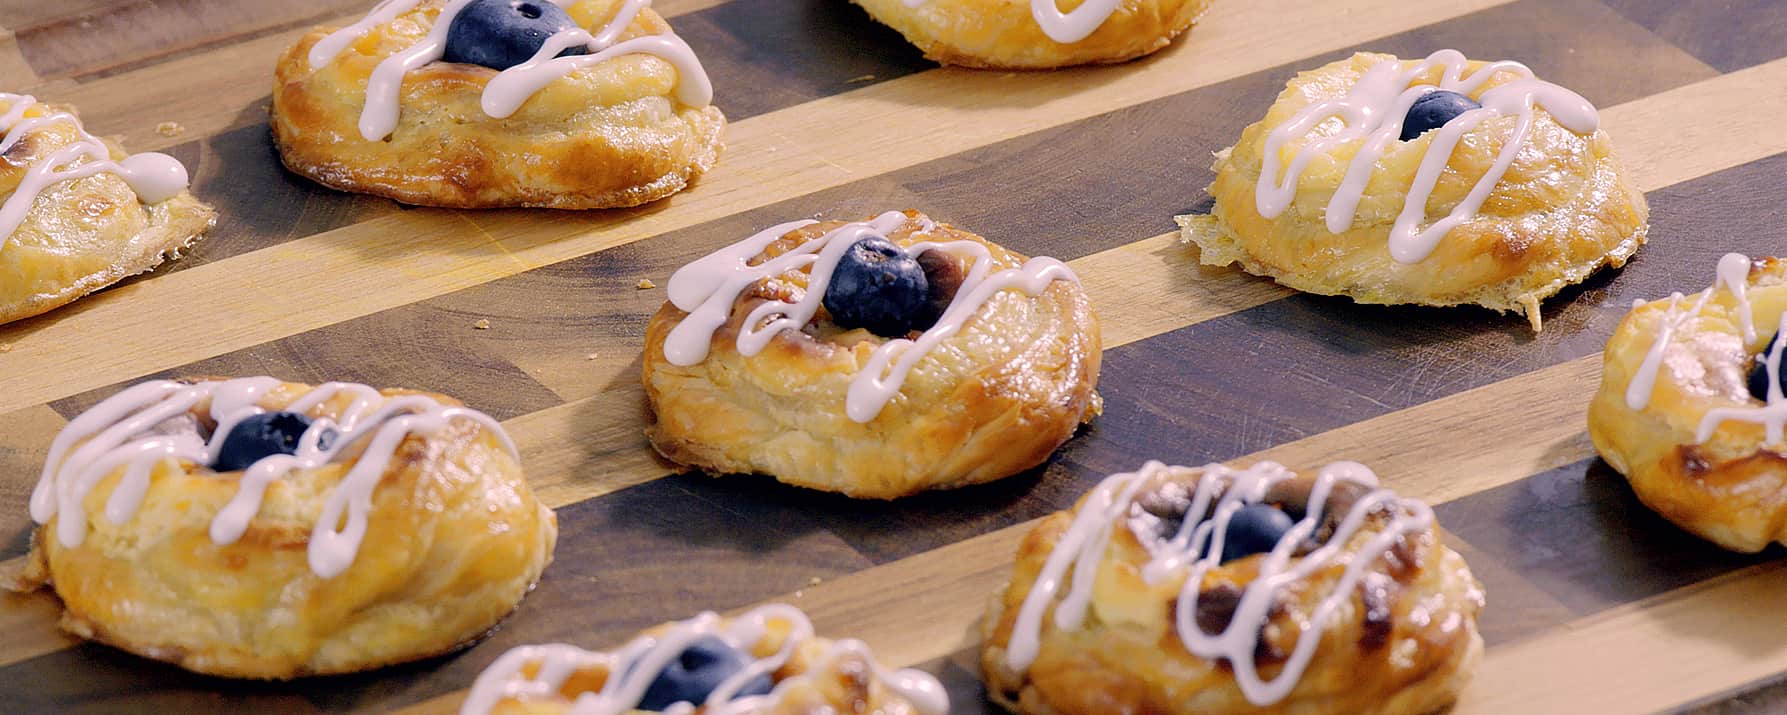
Our recipe's Mini Cream Cheese & Berry Danishes come together fast, look beautiful, and taste like you picked them up from a legit bakery.
Why This Recipe Works
We've all been there: grabbing a hot coffee and a cheese Danish from a café or gas station shop on the way to work or during a road trip. It's soft, sweet, just creamy enough—and strangely comforting. But what if we told you that same experience is just a few ingredients away, no commute required?
This toaster oven recipe delivers everything you love about that classic pastry: golden puff pastry, tangy-sweet cream cheese, juicy berries, and a drizzle of icing. But it's easier than it looks, and you don't need to leave the house—or preheat a full-size oven.
Ingredients

For the Danishes:
- 1 sheet puff pastry, thawed (from a 1lb box)
- 8 oz cream cheese, room temperature
- 1/4 cup of sugar
- 1 egg yolk, room temperature
- 1/2 tsp of vanilla extract
- 1 tsp of lemon zest
- 1/2 cup blueberries (raspberries, or blackberries)
- 1/2 tsp powdered sugar (optional, for dusting)
For the Egg Wash:
- 1 egg
- 1 tbsp water
For the Icing:
- 1/4 cup powdered sugar
- 1–2 tsp milk (or lemon juice)
Step-by-Step Instructions
1. Make the filling

Combine 8 oz cream cheese, 1/4 cup of sugar, 1 egg yolk, 1/2 tsp of vanilla extract, and 1 tsp of fresh lemon zest in a mixing bowl. Beat for a few minutes until smooth and whipped.
2. Roll and cut the dough

Unfold a sheet of puff pastry on the cutting board (lightly floured) and gently roll it into a 10 "x 10" square. Using a pizza cutter, slice into about 1-inch even strips.
3. Twist and shape

Gently twist each strip from end to end into a ribbon. Press one end of each strip onto your work surface and coil the rest around into a circle, starting from the center. Pinch the end to secure and lightly flatten the center with your fingers. Poke the center with a fork to prevent puffing.
4. Add the filling

Using a small cookie scoop or spoon, place a tablespoon of the cream cheese mixture into the center well of each pastry and level it slightly.
5. Prepare the bake
Transfer the shaped pastries to a piece of foil cut to fit your HeatMate toaster oven's toasting net.
6. Egg wash
In a small bowl, beat 1 egg with 1 tbsp water. Brush the outer edges of the pastries thoroughly with the egg wash.
7. Baking

Bake at 375–400°F in your toaster oven for 15–20 minutes, or until golden brown around the edges.
8. Add the berries

Remove pastries when they're done and gently press fresh blueberries or raspberries into the center of each pastry. Let the pasties cool off before glazing.
9. Cool and finish
Let pastries cool completely to room temperature. Once cooled, transfer to a serving board and generously drizzle with a cookie icing.

Chef's Notes
- Thaw puff pastry; read the package instructions first. If rushed, it may become sticky and hard to work with.
- Be patient and allow the pastries to cool completely after baking. The cream cheese filling sets like cheesecake—it's worth the wait.
- Always glaze once the pastries are thoroughly cooled. Glazing too early will cause it to melt and slide off.
- Don't hold back with the glaze—we use every last drop (and lick the spoon too).
- Feel free to swap in other fruits like raspberries, sliced strawberries, or cherries.
- Don't skip the lemon zest in the filling or glaze—it brightens up the whole bite.
- These Danishes are best eaten fresh, or you can store any leftovers in an airtight container in the fridge for up to 2 days. Then, reheat for 2–3 minutes in the toaster oven at 250°F.
- Want to try other fruit? Raspberries, chopped cherries, or even thin apple slices work beautifully.
- Don't skip the lemon zest—it adds that bakery-fresh aroma that really makes the cream cheese filling pop.
Nutrition (per Danish)
Calories: ~280 | Protein: 4g | Carbs: 22g | Fat: 18g
(Nutritional estimate based on general ingredient calculations using USDA FoodData Central)
Wrapping It Up
If you've ever loved a cheese Danish from a coffee shop or a gas station snack aisle, this recipe will bring that nostalgia home—with more flavor and less sugar. The flaky pastry, the tangy-sweet filling, the warm berry burst… all of it, right from your toaster oven.
No morning rush—or road trip—required.
Craving more pastry recipes made simple? Head to our "Toaster oven recipes" section and explore our full collection.


Share:
The Smarter Dorm Kitchen: Why Every Student Should Consider a Toaster or Toaster Oven
The Ultimate Hasselback Baked Potato Recipe for Toaster Ovens